Tuesday 11 March 2014

Air Support

I recently finished up my  first aircraft for my Flames of War Canadians.  It is the Hawker Typhoon mk 1B.  

Modeling:
A friend of mine found a company called Revell which makes plastic 1:144 scale WW2 planes.  What is nice about the planes is the price point of $5.  The models go together fairly well.  Simple to build but they do tend to have a few gaps around the edges of the wings.

When I primed the model I was using an old can of War Paint primer.  The can had been sitting for a while and I think it had a small leak near the seam.  I used it anyway and at first look it appeared fine.  When I came back 30 minutes later the paint had turned gummy.  I scraped most of it off and filed down the rest (for 5 bucks I did not want to put in the effort of stripping the primer).  I gave it a base coat of GW chaos black spray.  In the end the details are a bit rough and there are some odd textures but I think they actually work with the plane's camouflage.  Lesson learned: always test the primer and wait a bit to see what happens.

For the camouflage I used the same technique that I used on my German armour, but with different colours.  The decals in the box were really nice and made the model pop.

History: 
The Typhoon was originally designed to be a interceptor/bomber to replace the Hawker Hurricane in 1941.  However the Typhoon had some design flaws that made it underperform in that role.  Instead it maneuvered really well in lower altitudes.  This made it perfect to work as a fighter/bomber.

The Typhoon was able to reach speeds of 405mph at 18 000 feet.  This new plane to the Royal Air Force (RAF) was one of the few planes that was able to intercept the
German Luftwaffe's Focke-Wulf Fw 190 aircraft in low altitudes. 

By 1943 the allies needed a plane that was able to attack land targets more than other aircraft.  In addition to four 20mm cannons the Typhoon was equipped with two (500lb or 1000lb) bombs or eight rockets.  The Typhoon was able deliver an attack equivalent to a Royal Navy Cruiser's  broadside.

 Kevin


Wednesday 5 March 2014

Shermans are Operational

I have been working on 2 new Sherman platoons for my Flames of War Canadian force.  One down and one to go.

The Sherman was the second most produced tank during World War 2, next to the Soviet Union's T-34.  It was developed by the United States and through the "Lend Lease" program, used throughout the Commonwealth Forces and even the Soviets. 

Sherman with M3 75mm
The Sherman was comparable to early German Panzer tanks.  However with the thinner armour plating and a less powerful gun, the Shermans were far outmatched against the heavier German Panthers and Tiger tanks.

Firefly with OQF 17pdr
The main armament for the Shermans in the Commonwealth was the M3 75mm gun.  However the Sherman Firefly was rolled out to help add extra punch to allied tank platoons.  The Firefly had the same Sherman chassis but had a much stronger gun.  The British attached the powerful OQF (Ordinance quick-firing) 17pdr gun to help punch through German armour.

I used a different style for these new tanks (compaired to my old ones).  I used washes initially to create shadows.  Then drybrushed to blend it in.  However the matte varnish spray really darkened the green and ironically made it a little more shinny.

I wanted the tanks to pop a little so I used the late war decal pack.  I did some research on tank markings and what they meant.  Most allied tanks had several stars on them, these were often smaller ones on the side and rear and a larger one up front or on the the top of the tank (to identify to aircraft).

The left side of the tank has the regiment icon (red with a 51 symbolized senior regiments).  The right side is the army division (in my case the Canadian 4th Armoured).

Vehicles also had serial numbers.  Ones starting with a T were tanks (while halftracks were Z etc).

Vehicles also often had a bridge classification number painted up front.  These numbers represented what vehicles could cross which bridges.  The lower the number the lighter the vehicle.  While a truck may have been rated as a 5, a Sherman was a 27. 

Second Squad is underway

Kevin


Monday 24 February 2014

The Duck-man

I finished my latest Discworld miniature a few weeks ago.  The Duck-man is another member of the Canting Crew (Foul Ole Ron and Arnold Sideways, which I have already painted are also members)

The Duck-man is considered the smart member of the Canting crew.  He used to be well off and successful.  His tattered clothes are that of an old well tailored suit.  He recounts eating in the very finest of restaurant.  He also has the bounty of $132 000 for his head from the assassins guild.  So someone really wants him dead.

The only really odd things about the the Duck-man is that he is oblivious to a duck that lives on his head. He also does not understand why people around him keep quacking.


I tried painting a little stubble on the Duck-man's face.  I used 2 layers of some watered down "grey-white".  I also tried going for some mud splashes on the suit.  I am not to happy with the duck though.  It looks sloppy and rushed.  I will probably repaint the duck at some point. 

Kevin

Wednesday 12 February 2014

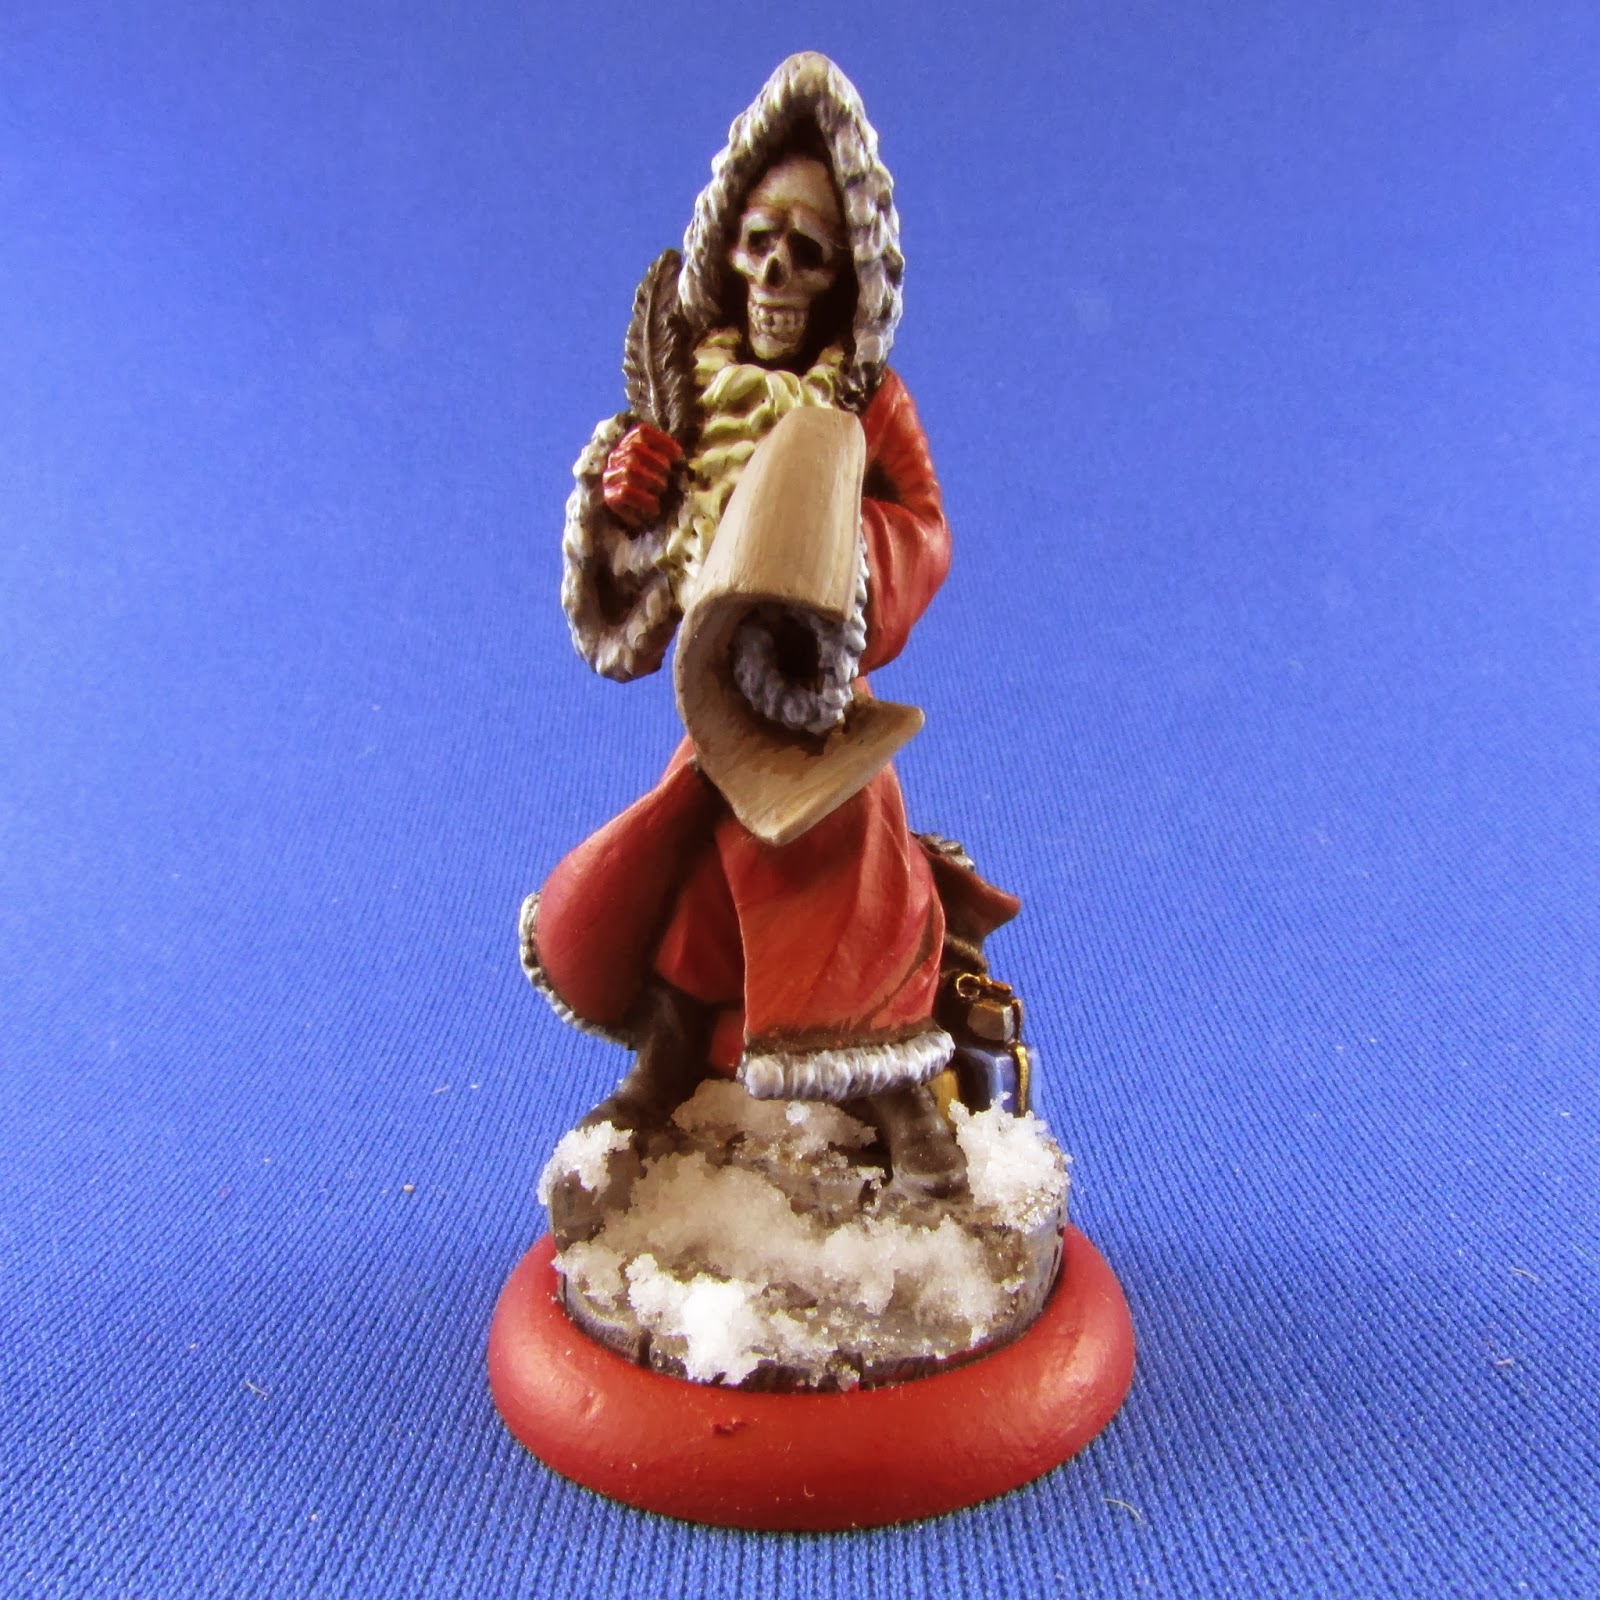
The Hogfather

        The Hogfather by Terry Pratchett is one of my all time favorite books (and one of the few that I have read more that once). I try and read it almost every December. For people who have not read it I will give a brief summary.

       The Hogfather is an anthropomorphic personification in the Discworld (he is basically Santa Claus). However he is a little more rough in appearance (he has tusks) and 4 large boars pull his sleigh. In the book, an assassin is hired to kill the Hogfather. Death (the character) believes that the world needs to believe in the Hogfather or the sun will not rise. So Death pretends to be the Hogfather (complete with a false beard and a pillow stuffed into his jacket) to maintain the belief. Meanwhile his granddaughter, Susan, tries to figure out why her grandfather is pretending to be the Hogfather. Susan must figure everything out and save the real Hogfather.
The book is peppered with enjoyable humorous character such as, the Oh God of Hangovers, a tooth fairy, and the Veruca Gnome. I can't recommend this book more!

       When I found out that Micro Art Studios also made a Hogfather miniature I had to paint it this December. I ordered it a little late and it had to come from Poland but it arrived shortly before Christmas. Sadly I did not get enough time to finish up Elf Albert too. I frantically tried to get The Hogfather painted by Christmas. I wanted to use it in a game of Guards Guards after Christmas dinner (which I won). I put the snow on the base at 11pm on Christmas Eve.

       I tried some different paint for the red this time (compared to how I painted my Blood Angel army). I felt it made a good solid colour. The main difficulty I had with the model was doing so many different shades of white/bone. I ended up going with yellows, greys and brown bases with the same highlight white to mix in.

Kevin


Friday 31 January 2014

Christmas Gift Project - New Painted Tank

 This post is a little late (as you can probably guess from the title).  I managed to complete the project two days before Christmas.             

             Last year, for Christmas, I painted a Flames of War German Pather tank for a non-gamer friend of mine.  When later he saw my winter themed Germans, he kept asking for a "snow tank". What a better way to complete that request then with a new Christmas present.

              This year I wanted to paint something for him that was a vehicle but not necessarily a typical gun tank. I ended on a British half-track. I have always liked the looks of a half-tracks but had never painted one. I figured that the troops in the back would look great in a diorama.

              I used the same type of display box that I used for the previous tank. I built a little base and used some pre-made pine trees in the background. This was also the first time I had used decals.  The dessert rats symbol looks awesome so I used that one. It was a little finicky to get the decals to stay in place.  I used a little watered down Wellbond glue to help secure them.

              I added a little snow flock to some Wellbond to make the snow drift. For the trees I sprayed them with stiff hair spray and sprinkled snow flock over top.

             I hope he liked it.


 Kevin